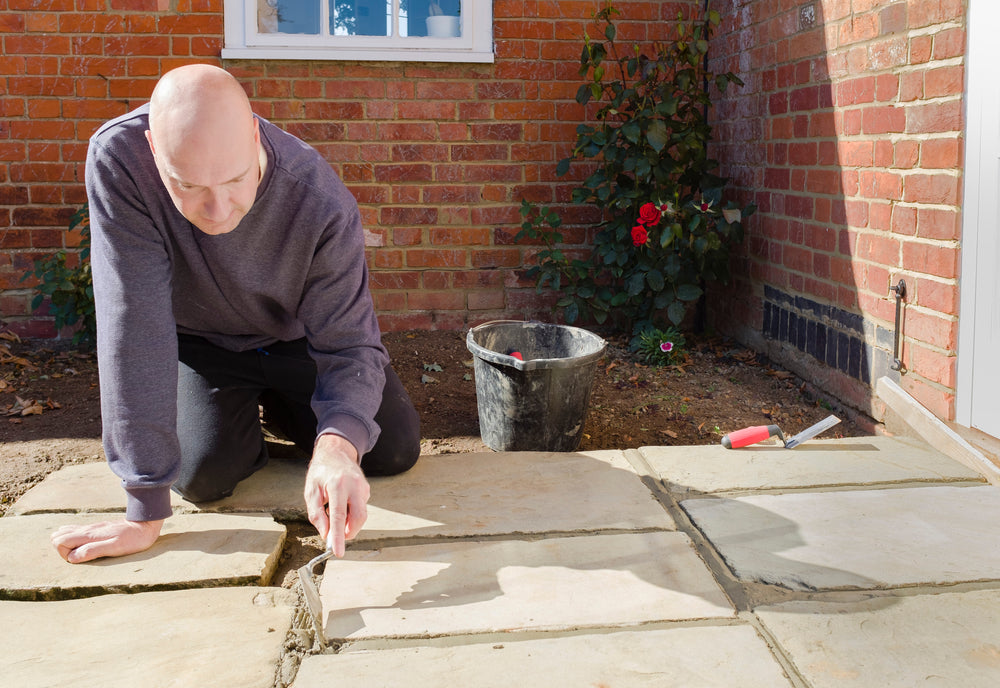
Grouting is an important job for maintaining your paving. To most inexperienced individuals, paving grouting can seem like a very daunting task. However, it is far simpler than you may initially imagine and can truly be done by anyone.
Grouting is the placement of a sealant between paving jointing in your paving. There are numerous ways of effectively grouting your paving stones. There are also different application processes for each different method. It is important to know the information to avoid causing any irreparable damage to your paving.
Unfortunately, it is not uncommon for grouting to become dislodged and loose over time due to natural wear and tear and even in the process of cleaning your natural stones. Knowing and understanding how to grout your own paving could overtime save you a huge amount of hassle and money.
What is the importance of grouting paving stones
Grouting your paving is not only done for the aesthetic, but it also has a huge amount of functional benefits that can help the performance and longevity of the paving. Its main feature is that it provides a waterproof seal to the driveway and patio joints of the paving. Preventing water from being able to penetrate the joints will stop seasonal damage from frost that forms under the paving stones causing them to bulge and rise.
Aesthetically, grouting your stones gives the paving the overall finished look of your paving or driveway. This means that when grouting starts to become loose and break away, your paving is not only vulnerable to its environment but is also left looking scruffy and unfinished.
The jointing grout is also used to hold the patio slabs in place. Keeping the slabs locked in place stops them from shifting over time when met with difficult weather conditions and therefore ruining the overall look of the pavers.
In addition to this, the paving slab jointing mortar also prevents weed growth between the pavers which can become a huge nuisance, especially in the warmer months. It is also impressively effective at absorbing and repelling water.
Sand & Cement Mix

The method of sharp sand and cement is one that has been used for a huge number of years and also is still to this day a favourite of many. This is by far the most DIY method as you are the one who makes your own jointing compound through the two materials.
While the method is not the most technologically advanced method on the market, it is very much tried and tested due to its use through the years. It is also surprisingly very durable and should work very effectively in most environments. Its main benefit is undoubtedly how cost-effective it is compared to the other methods.
However, as you can imagine the method also has its fair share of disadvantages. The most worrying and off-putting would be how messy this particular method can be. It can also be how messy the particular method can be. It can also result in staining your paving stones, which will ruin their overall aesthetic. The process is also extremely time-consuming when compared to some of the other methods.
Application
- To make the mixture you add 1 part cement to 3 parts sand to 6 parts aggregates. It could be a good idea to make it in separate batches to avoid the mixture drying out.
- Load some of the mixtures onto a trowel and carefully start to fill in the paving gaps. Make sure that you do not get any of the mixtures on the paving surface as the cement will stain the slabs.
- Make sure that you pack down the mortar until it is nice and full. You can then use a pointing iron to smooth the mortar.
- Quickly clean off any excess mortar to avoid staining.
- Leave for around an hour to dry and then sweep again to sweep off any additional mortar or dirt.
- Make sure that there is no use of the paving for around 48 to allow it to fully dry and settle.
Jointing Compounds

Joint-IT jointing compound is a compound that has come about in the last decade and has taken the market by storm. The brilliance of these one-tub solutions is how unbelievably efficient they are. The tub has all of the mixture needed, without you having to add anything at all to it.
The phenomenal solution has a huge list of benefits that make it incredibly popular. As we have already talked about, the simplicity of the application process allows you to simply brush the Joint-It jointing compound in place. It truly could not be any more simple.
The compound is suitable for use on most stones such as Indian sandstone, limestone, granite, Yorkshire and porcelain. It also comes in different colours, giving you the chance to pick the colour that compliments your choice of stone the best.
It is also designed for use in all weather conditions so you do not have to worry about the conditions and can use the mixture all year round. On top of all these great benefits, once dried and properly applied then it is hugely effective and does its job phenomenally.
The only real disadvantage of the one-tub jointing compound is that it can leave a stain on the paving stones if not applied correctly. This is a common disadvantage for most patio area grouting methods but one that is easily avoided by just following the application instructions.
Application
- Before using the Joint-It jointing compound, you should thoroughly wet your paving using a hosepipe.
- Pour the solution onto your paving and get it nice and damp.
- Use a soft-bristled brush to brush the jointing compound into the spaces between the slabs (make sure to consistently add more water to ensure it does not dry up).
- Wash away the excess jointing compound.
- Let dry for 14-40 mins and then sweep away any leftover excess.
Two-Part Compounds

A two-part compound solution is a combination of a resin binder and an activator. This is by far the priciest of all the options, however, extremely effective. This is normally a process that you would bring in a professional landscaper to complete.
While the mixture can be slightly tedious to put together, once mixed its application process is relatively quick and simple. It would be a quicker and most likely more accurate job if completed by a professional. However, it can still be executed by an inexperienced individual when extreme care is taken.
Once the application has been completed correctly, it is unquestionably the strongest compound that there is on the market. But it does have its fair share of disadvantages. It is a hugely complicated process to get your head around and if you get it wrong then it has the potential to permanently damage your paving.
Application
- Add the resin activator to the filler and mix. Sometimes adding a small amount of water can help the mixing process.
- You should continue to mix until the resin has been thoroughly mixed into the filler.
- The patio should be thoroughly soaked before pouring, ideally by another individual while you mix to avoid the mixture drying out.
- Pour the mixture onto the pre-wetted area and patio gaps. The compound will settle and smooth on its own.
- Leave for 10-15 minutes before sweeping the patio surface with a soft-bristled brush.
- Leave for 24 hours before walking on the paving and up to 5 days before vehicles can go on the paving so that the compound has time to cure properly.
Summary
Grouting your paving slabs is a hugely important job that helps to protect and prolong your block paving. Without grouting your patio then it would become susceptible to damage from harsh weather conditions, which for an outdoor area in the UK, renders it pretty much useless.
You should never have to worry about weather damaging your patio paving and grouting makes sure of this. However, it does not last forever and therefore needs to be regularly reapplied. Being able to apply patio grout yourself is a hugely valuable skill to have and one that could potentially save you a fortune over time.